Exercise: Parametric facade (4/4)
Step 6: Create floors
Now that each floor’s facade geometry is defined, the last step is to rebuild the floor and ceiling of each floor so we can join it with each floor’s facade and end up with one joined Polysurface for each floor. In the previous exercise, we used the Cap Holes component to automatically close planar openings in the extrusion geometry. This will also work here, but since our facade openings are also planar holes, the Cap Holes component will fill those as well.

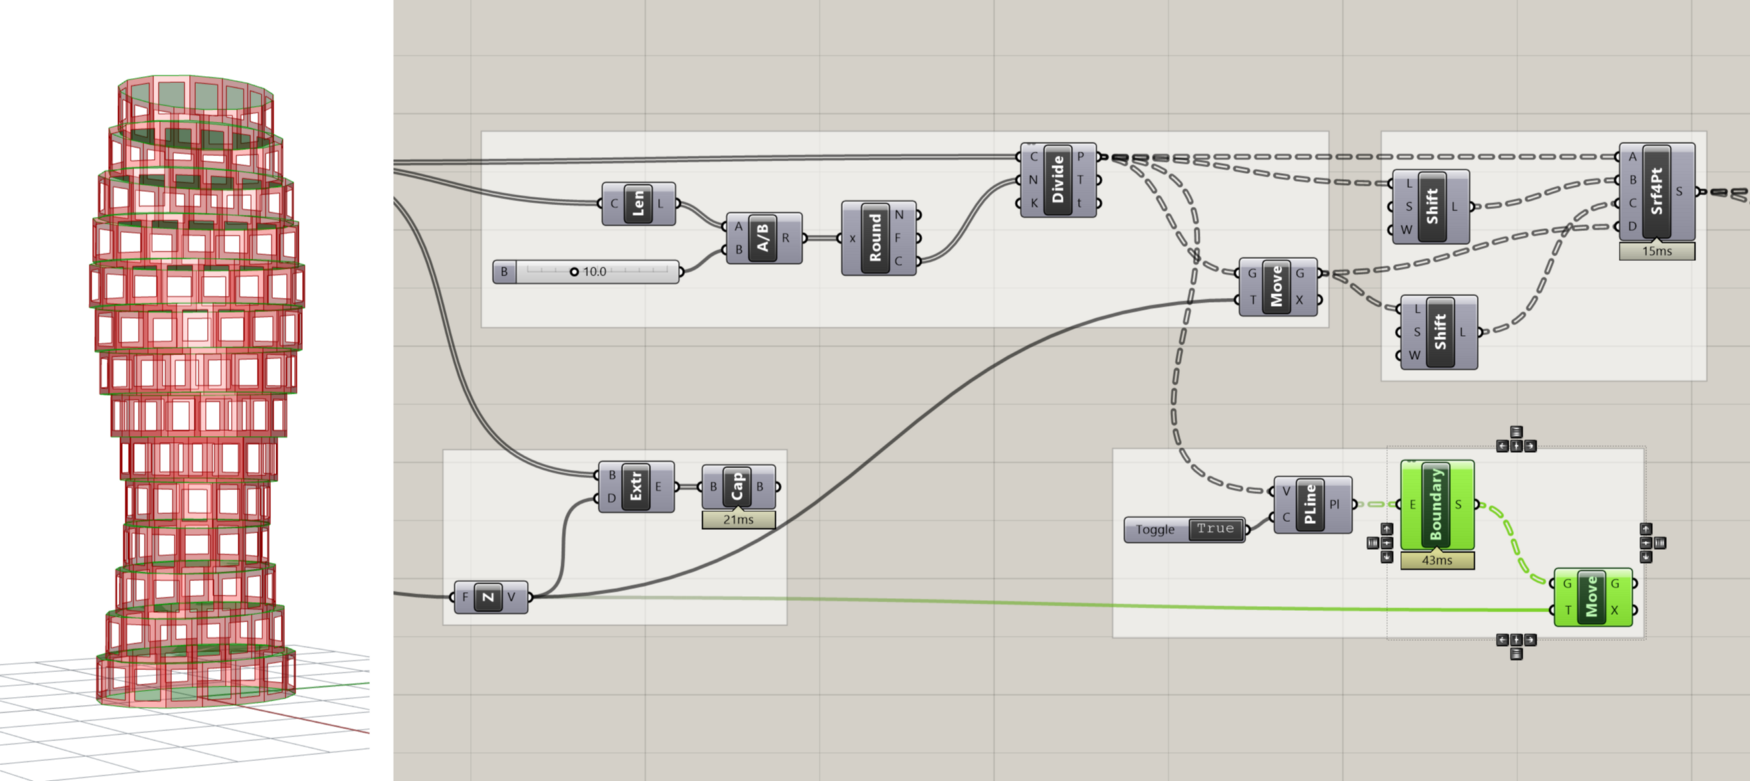
Instead of capping the holes automatically, let’s manually build the new floor and ceiling geometries based on the same Points that define the corners of the facade panels. First, we will create the outline of the floors connecting the Points created by the Divide Curve component into a Polyline component, which will connect the points on each floor into a single Polyline. Make sure to set the Polyline component’s Closed (C) input to True so that a closed Polyline is created for each floor. Otherwise, you will be missing the final segment connecting the last point in each list back to the first.

A nice visual way to control Booleans in your definition is by using the Boolean Toggle Input component, which will create a new Boolean variable and allow you to toggle between True/False values by double-clicking on the label.
Once we have the boundary curve for each floor defined, we can use the Boundary Surfaces component to create a planar surface for each floor, and the Move component to move each floor up to form the ceilings. For the Move component’s translation vector we can reuse the same vector we used to create the top set of corner points for the panels.
Step 7: Join it all together
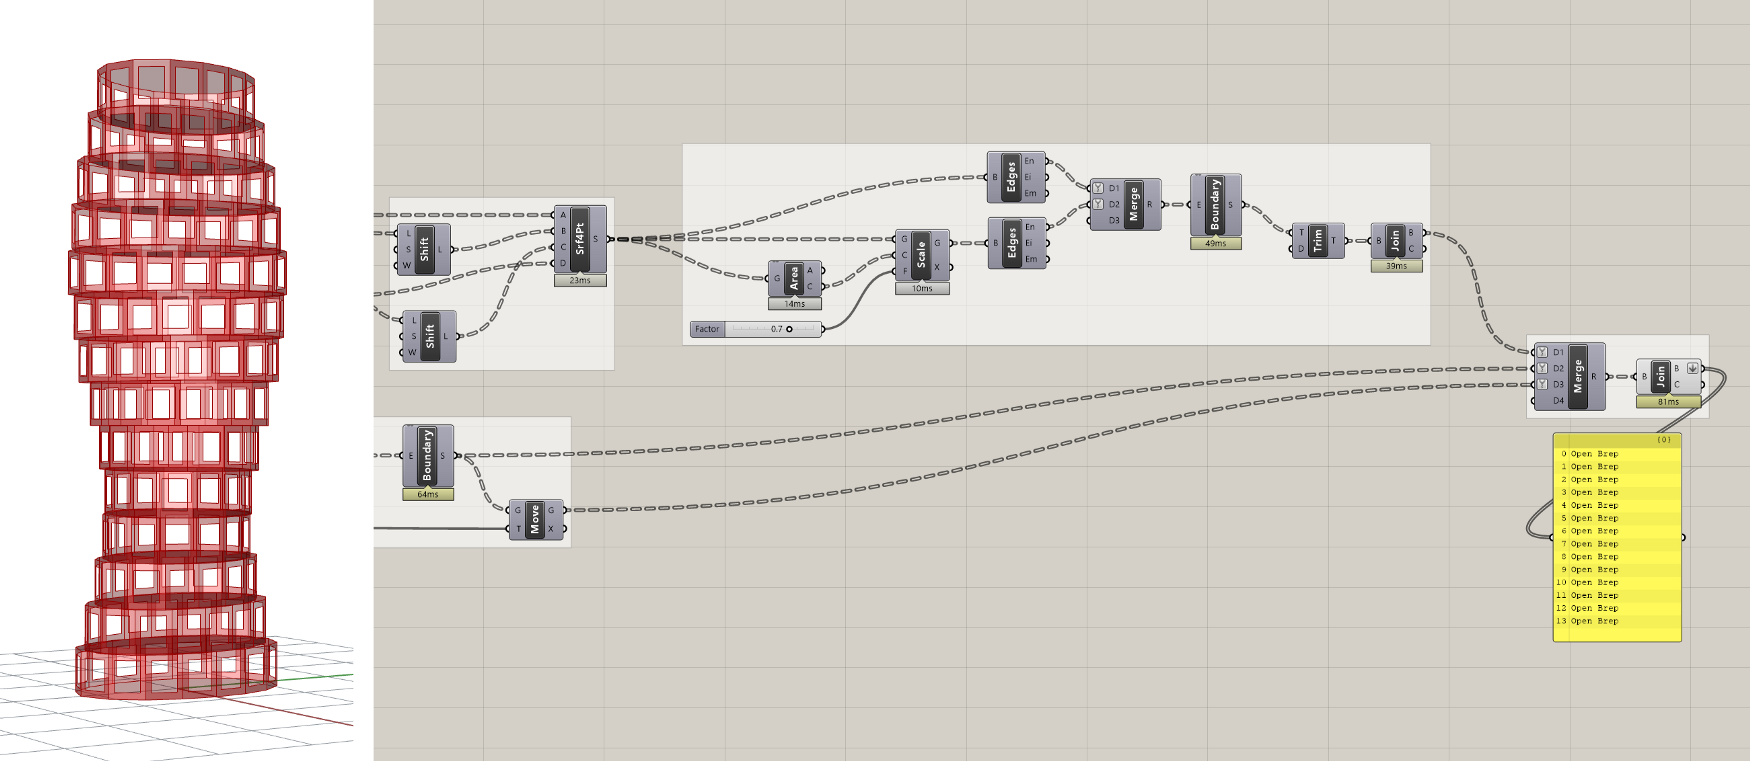
Now that we have the facade, floor, and ceiling defined for each level of the building, we can use the Merge and Brep Join components one more time to combine the data into one DataTree and merge all the geometries into one Polysurface per level. In order for this to work, we have to be sure that all the DataTrees going into the Merge component share the same structure — a branch for each level of the building with each branch containing all the geometry from that level. To make sure all the branches line up, you can apply the “Simplify” filter to each input of the Merge component.
If everything worked right, we should end up with one Polysurface for each level of the building. Since we used the same set of points to build all the Surfaces, we can be sure that everything will line up correctly and join together perfectly. Such is the beauty of computational design — it may take some time to build everything right, but once it’s built you can be sure that everything will function the way it’s supposed to. If you did get lost along the way or something didn’t turn out the way you expected, you can download a finished version of the demo here.
CHALLENGE
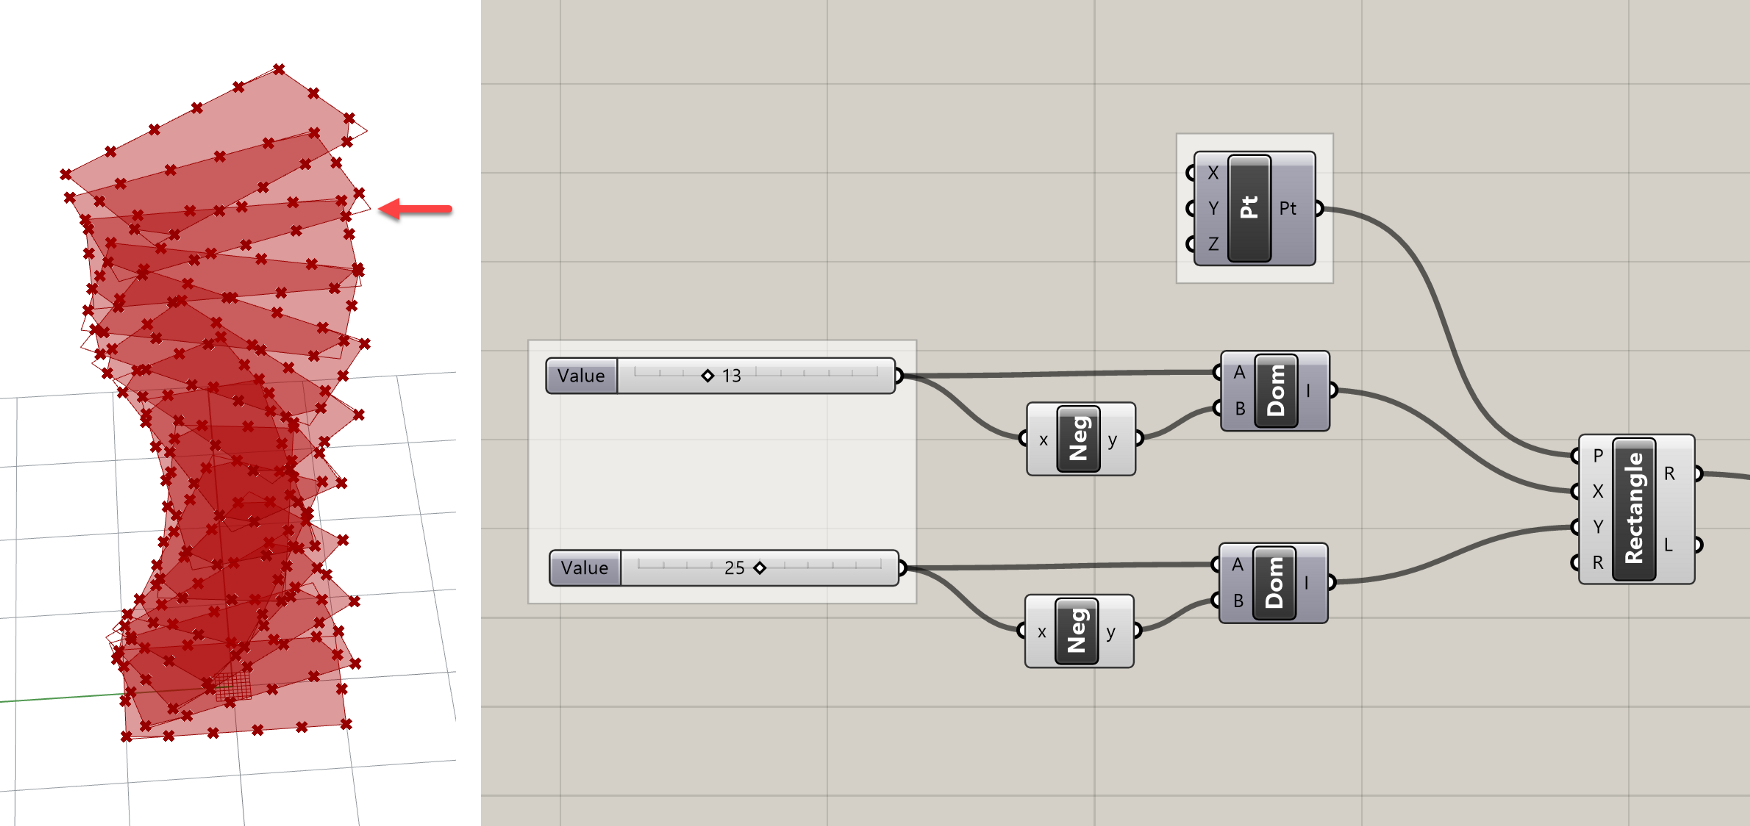
If you figured out the last challenge by using a
Rectanglecomponent to replace the elliptical floors with rectangular ones, you may see an issue applying the paneling in this exercise. Since each rectangle is a single Curve, depending on how they get divided you could see that some of the corners get cut or chamfered. Can you think of a way to solve this problem and force the facade panels to always end at the corners?Once you’ve made the changes, capture a screenshot of your Rhino and Grasshopper window so that the additional component(s) are visible. Name the file with your UNI and/or name, and upload to: https://www.dropbox.com/request/d0VZz7yBCyCTkyDoIzv4
Conclusion
In this exercise, we rationalized the tower geometry by generating a set of flat panel surfaces to approximate the curved shape of the tower. We also added an opening to each panel whose size can be controlled by a parameter. Spend some time experimenting with the model to see what kinds of variations and panel geometries you can create. In the next exercise, we will develop the tower further by creating a data-driven system for controlling the size of openings independently for each panel.