Getting started with Grasshopper (3/3)
Getting started with Grasshopper
Grasshopper started its life as a plugin for Rhino which you had to download and install separately. Since version 6, Rhino now has Grasshopper built-in, so if you are using Rhino 6 or later, you don’t need to install any additional software to use Grasshopper. You can start Grasshopper either by clicking the Grasshopper button in the toolbar or by typing Grasshopper in the Command line.
When you start Grasshopper, it will open up in a new window on top of your Rhino interface. The Grasshopper interface consists of two main parts: the components library at the top, and the canvas below.
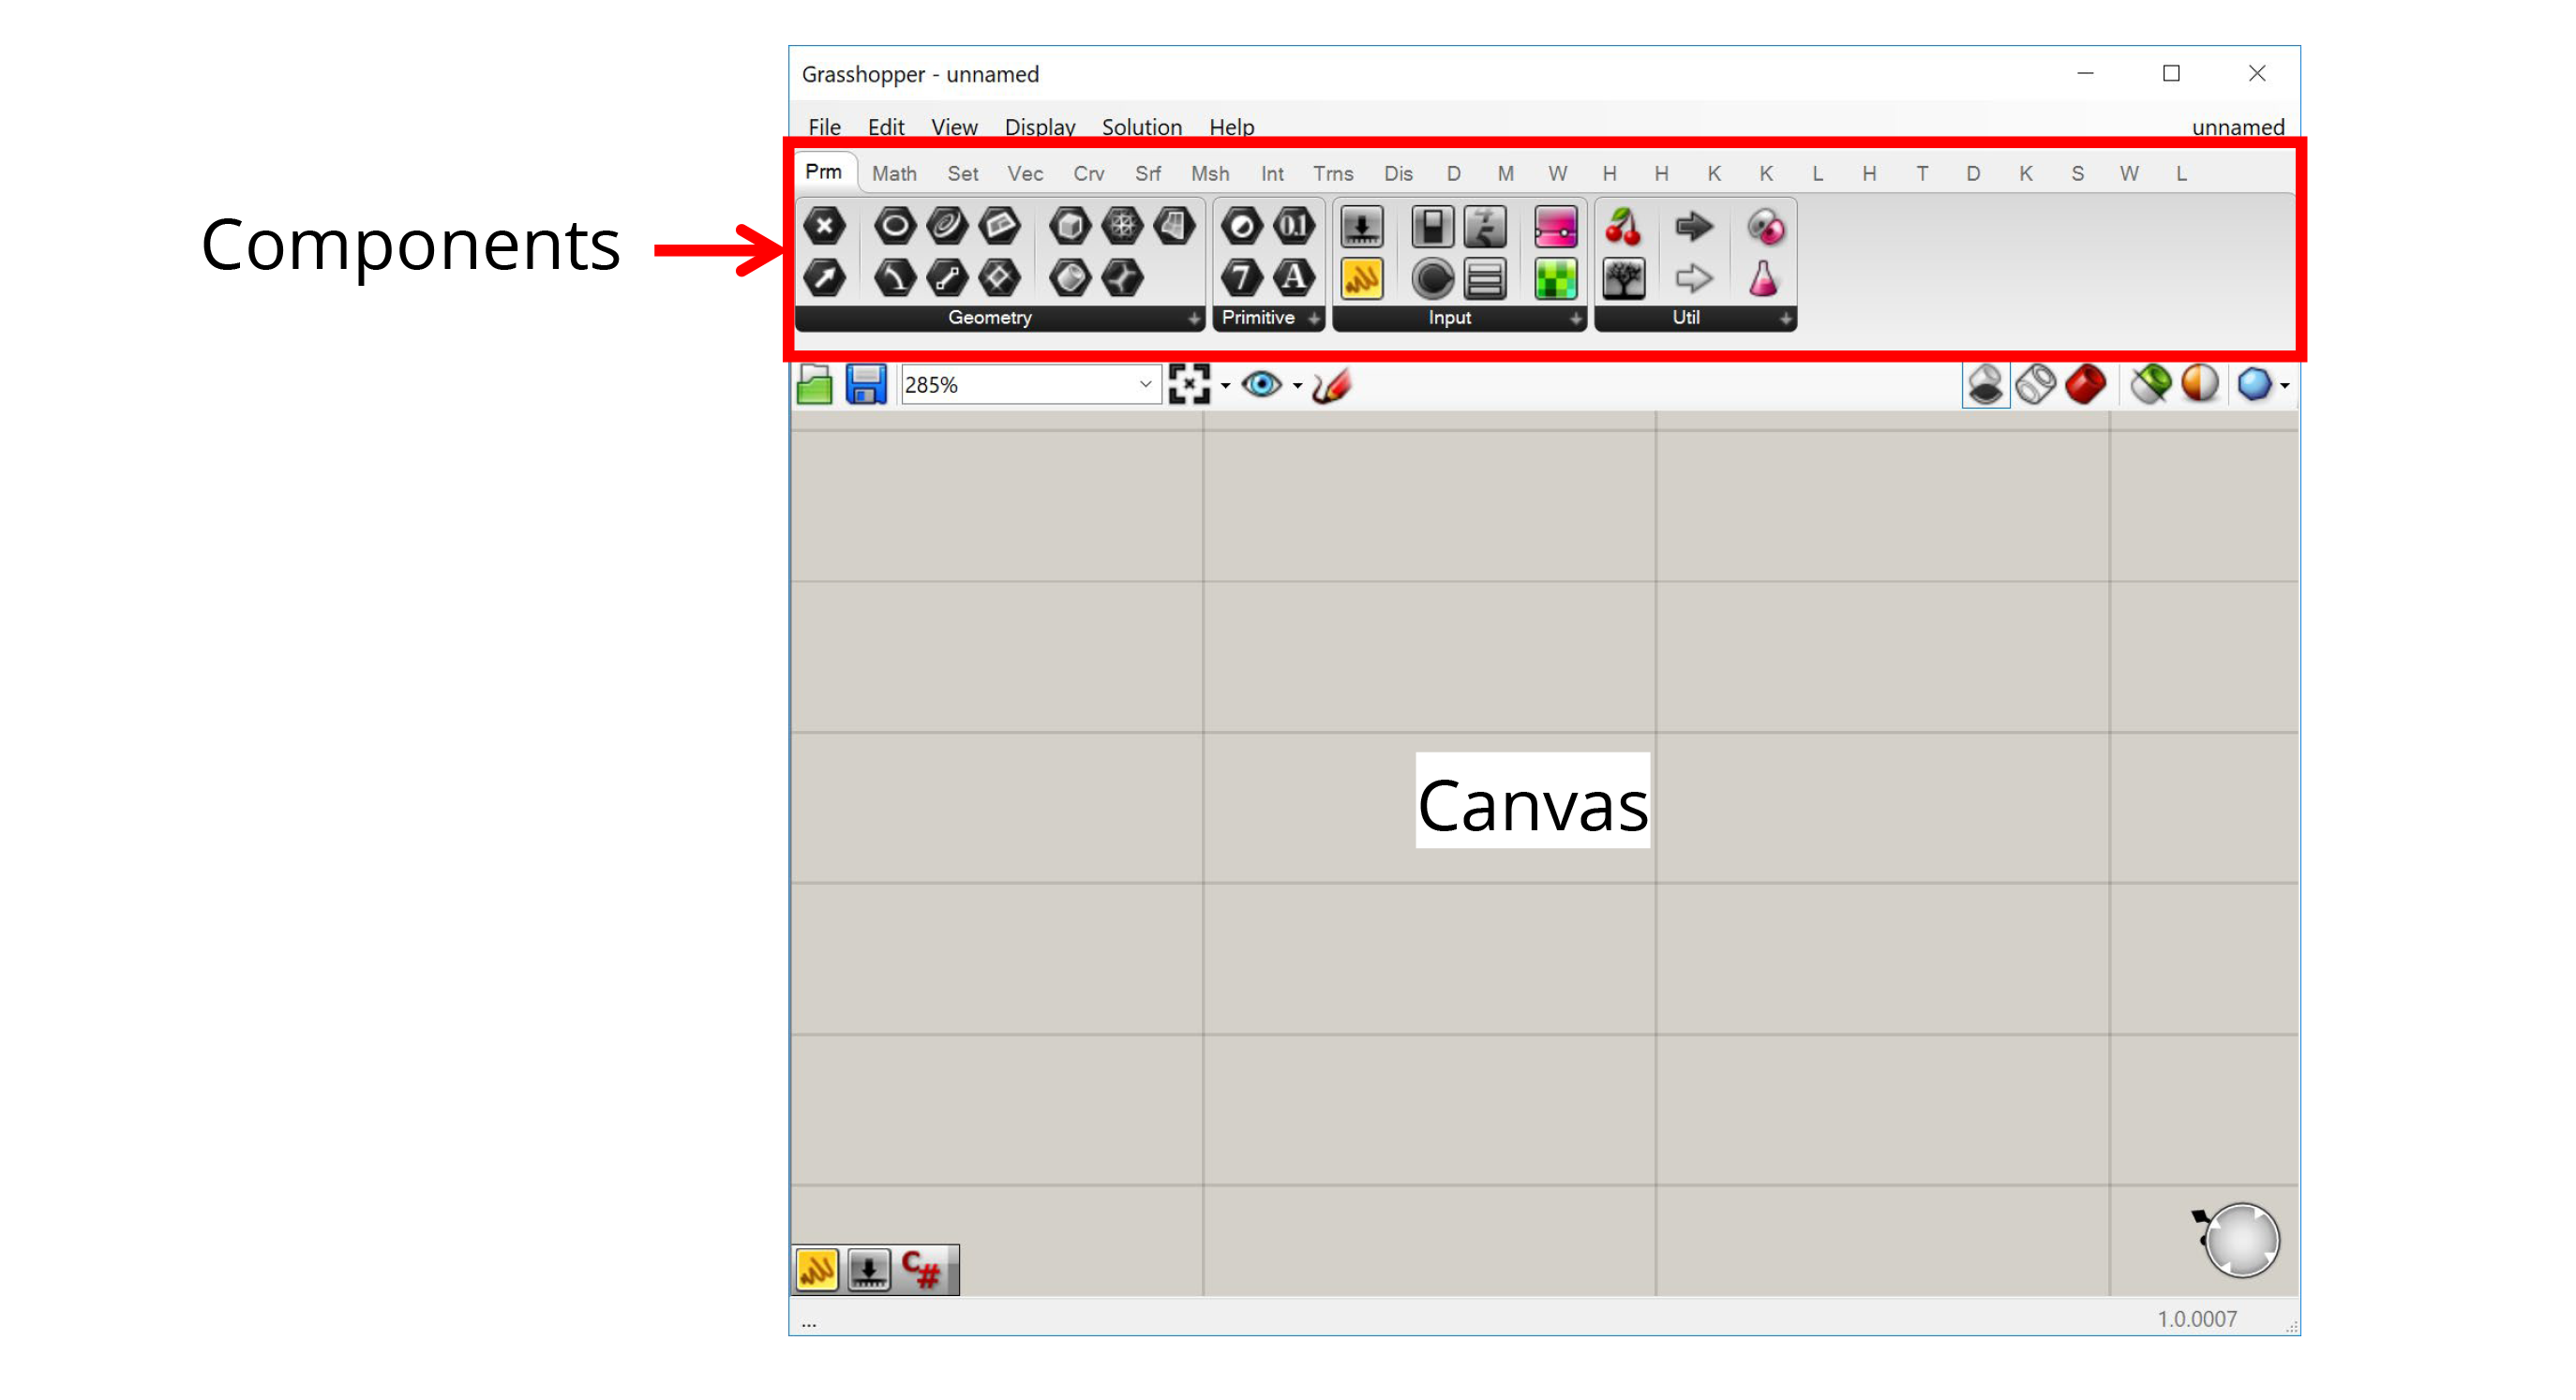
The components
The components library contains all the components that are available to use in your model. Grasshopper comes pre-loaded with a large number of basic components, and you can also download libraries of custom components made by other users (more on loading libraries later). Each component is represented by an icon in the toolbar, and they are organized according to their function or the library they come from.
The canvas
The canvas is the most important part of Grasshopper. It is the visual environment in which you develop your Grasshopper models. To create a model, you drag components from the top toolbar onto the canvas, and then connect them together with wires by clicking and dragging between an input and output node.
You can think of the Grasshopper window as a separate “view” into your Rhino file. The Grasshopper model developed within the canvas has a connection to the Rhino model from which it was launched, so you should think of both Rhino and Grasshopper working together in a common environment, using their own separate interfaces.
When you develop geometry in Grasshopper, you will see this geometry visualized within the Rhino viewport. You can also reference objects from Rhino into your Grasshopper definition. With certain objects like points, you even get an interactive widget that allows you to move the Grasshopper geometry directly within Rhino.
Any geometry developed within Grasshopper is considered “dynamic geometry” because it does not actually exist in the Rhino model, but is only displayed for preview purposes in the viewport. Because of Grasshopper’s connection to the Rhino model, however, you can take any geometry developed in Grasshopper and “bake” it so it becomes a permanent part of the Rhino file.
Because Grasshopper has its own interface and stores its own data, the definitions you develop in Grasshopper need to be saved to a separate file which usually has the extension .gh or .ghx. This file is separate from the .3dm file which contains your main Rhino file. This means that when you are working with Grasshopper, you typically are working in two separate files: a Rhino document and a Grasshopper model that is connected to it.
That concludes this module, congrats! Now that you have Rhino and Grasshopper open, go on to the next exercise, where we will build our first Grasshopper definition.