Exercise: Hello Grasshopper (2/2)
Step 3: Divide the circle
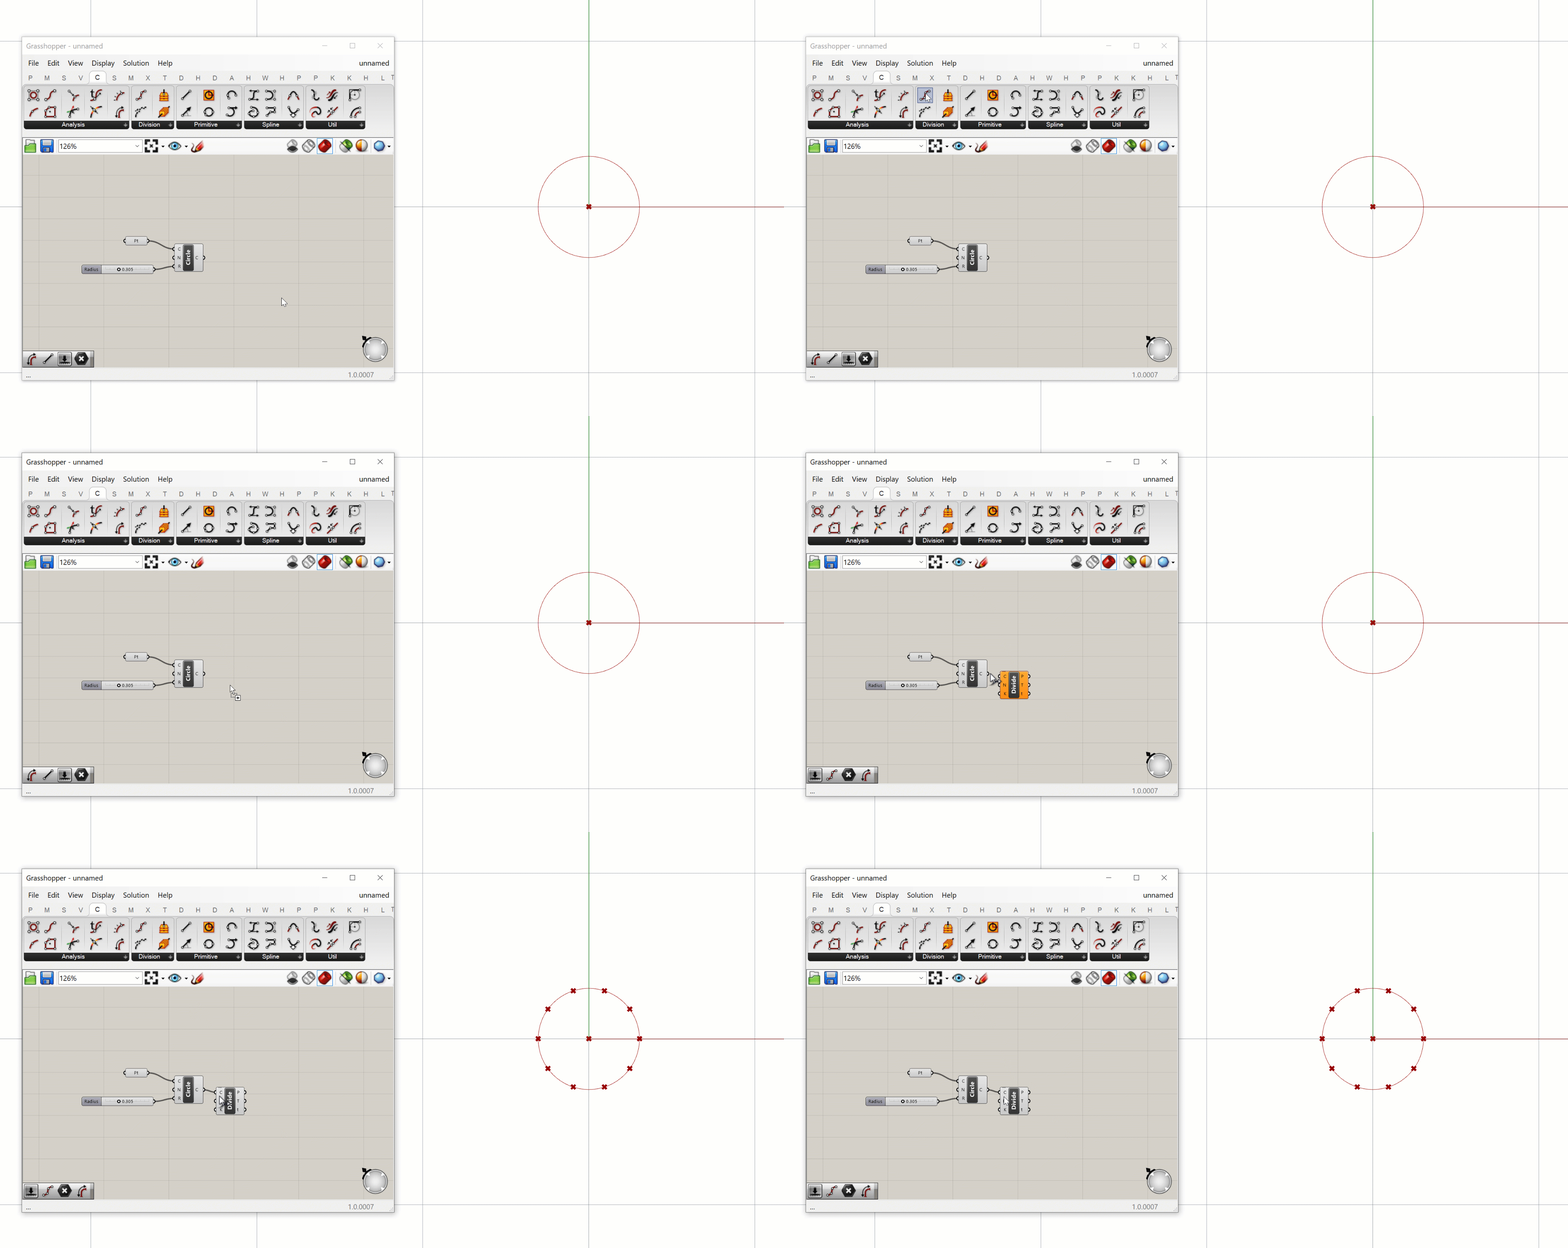
Now that we have one circle, let’s make some more! To make more circles, we will need more center points to define their location. This time, instead of creating the points manually, let’s generate them from the geometry we’ve already created.

To generate a set of points, we can use the Divide Curve component. Like the related Rhino command, the Divide Curve component places a set of points at even increments along a curve to represent divisions within a curve. You can find this component in the ‘Analysis’ group in the ‘Curve’ tab fifth from the left. Place the component to the right of the Circle CNR component on your canvas, and connect the (C) output of the Circle CNR component to the (C) input of the Divide Curve component.

The Divide Curve component requires 3 inputs: the curve to divide (C), the number of divisions (N), and a True/False value for whether to split the curve at kinks before dividing. As before, the second and third inputs have default values, so as soon as you connect the circle to the curve input you should see a set of 10 points appear around the circle.
The Divide Curve component generates three different outputs, which you see represented by three ports on the component’s right side. The first output (P) stores the actual points, the second (T) stores the curve’s tangent vector at each point, and the third (t) stores the curve’s parameter values at each point.
Step 4: Create more circles
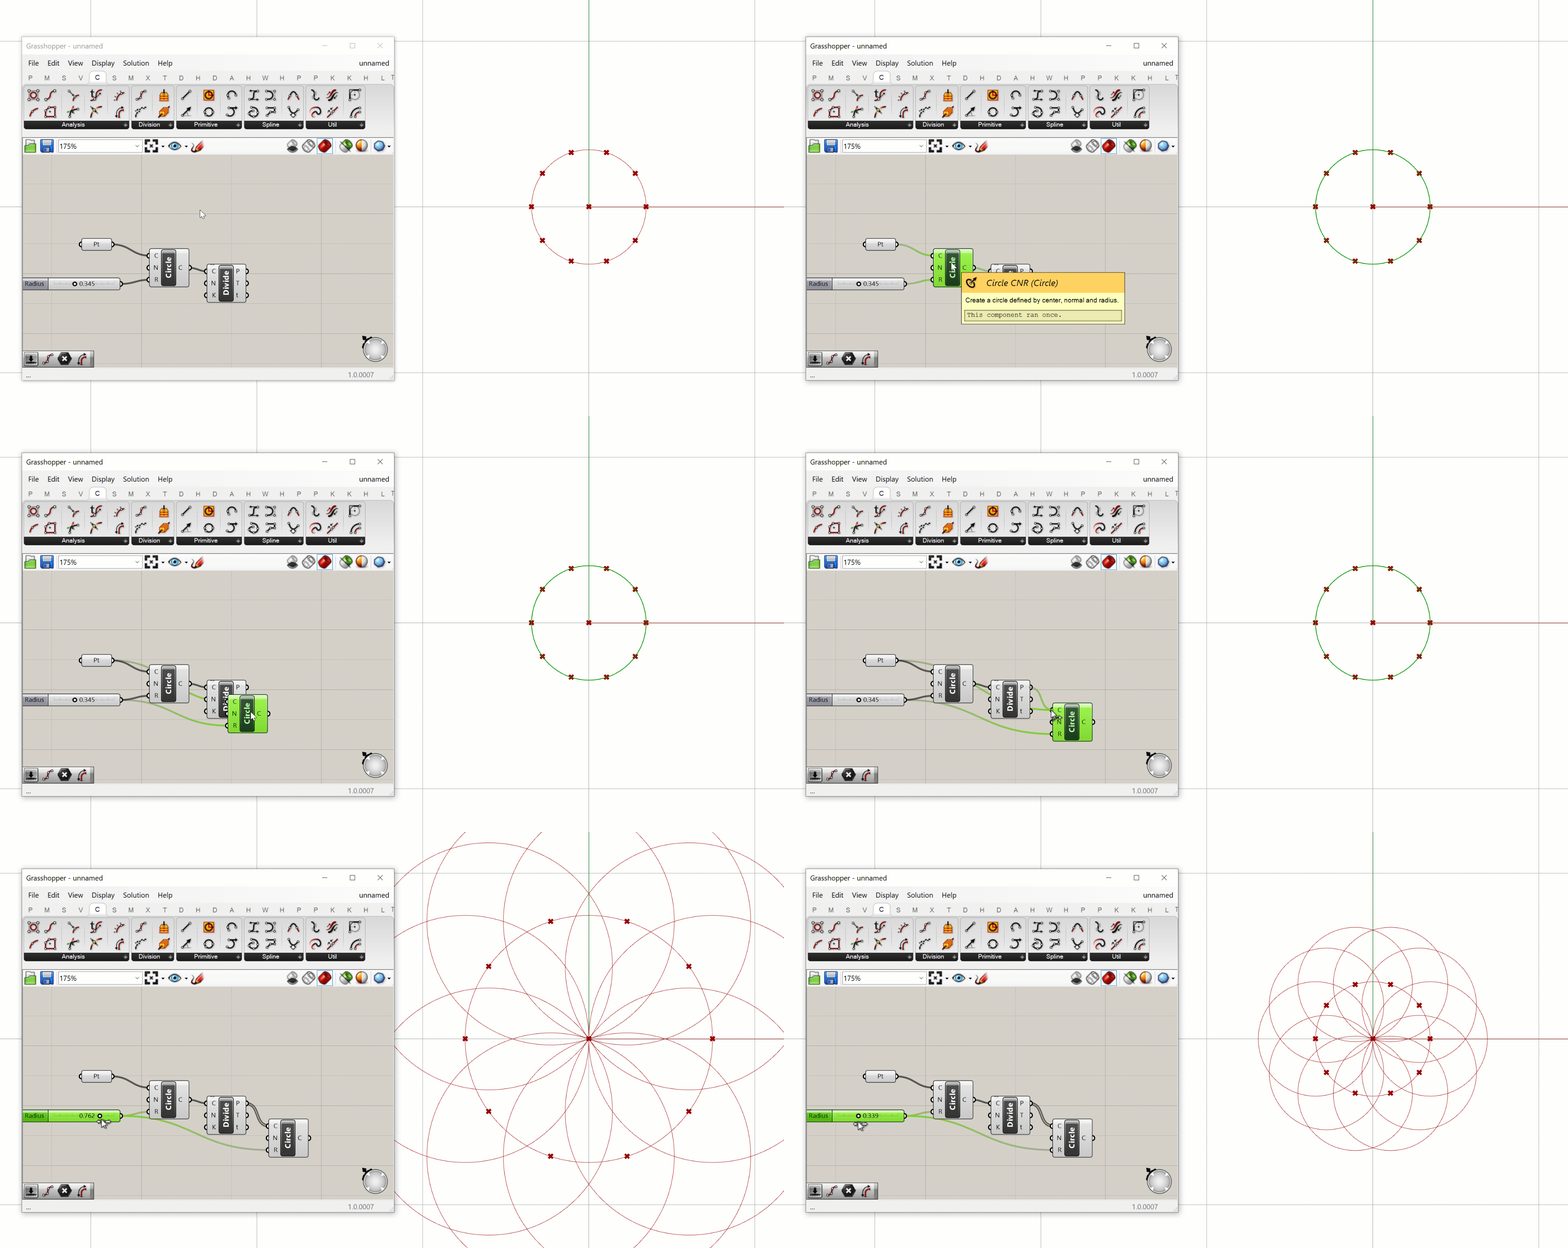
Now that we have some more points we can use them to define more circles using the Circle CNR component. If you want to reuse a component (or set of components) in your canvas you can easily copy and paste them using the ‘Ctrl+C’ and ‘Ctrl+V’ shortcuts. Copy and paste another version of the Circle CNR component and move it to the right of the Divide Curve component. You will see that the pasted copy keeps the same inputs as the original component, so in effect it is creating the same circle. To finish off our definition, let’s swap the new Circle CNR component’s (C) input to the new points stored in the Divide Curve component’s (P) output. This generates 10 more circles, one at each of the new points.

Notice that when we pass one point to the Circle CNR component we get one circle, and when we pass ten points we get ten circles. This is because the component runs once for each input supplied. We will discuss in more detail how Grasshopper handles multiple data streams, and how this affects how components run, later in the course.
CHALLENGE
Can you modify the definition to control the number of division points (and thus the number of circles generated) dynamically? Can you set it up so that the number of circles as well as their size is controlled through a single
Number Slider?HINT: since divisions happen in whole numbers you may have to change the range of the number slider to create values higher than 1.
Conclusion
In this exercise, we created a simple definition from five components that creates a set of related circles. Although it’s only a small example, it does illustrate the basic concepts of how we develop models in Grasshopper. Every Grasshopper model needs a starting point, and from there you build up complexity by passing data through more and more components. As you get more experience with Grasshopper, you will see that learning the components is only the first step of becoming a great computational designer. The true skill of computational design is learning how to approach design problems computationally, and break down complex problems into a set of simpler problems that can be represented through the right set of components.