Exercise: Parametric tower (1/3)
Step 1: Design concept and strategy
As with any design process, when approaching a new computational design problem it is useful to spend some time thinking through the problem you are trying to solve and formulating a concept and approach to guide your design process. Most Grasshopper tutorials only focus on the what of computational design, with step-by-step instructions describing the process of building a particular model. This can teach you some useful tools and approaches but misses the critical points of how to think about design problems computationally, and why we might want to do this in the first place.
When formulating a concept for your model, a good approach is to first sketch what you want to achieve and then “reverse engineer” it to figure out how to build it. In this case, I want to create a twisting tower with parameters to control the amount of twist as well as the height of the tower and the shape of the floors. I can start by sketching out what I think a twisting tower might look like. Don’t spend too long on these sketches, they don’t need to be especially detailed or of high artistic quality. Nonetheless, they are important for getting a rough understanding of what you want to build so that you have a good strategy for how to start in Grasshopper.
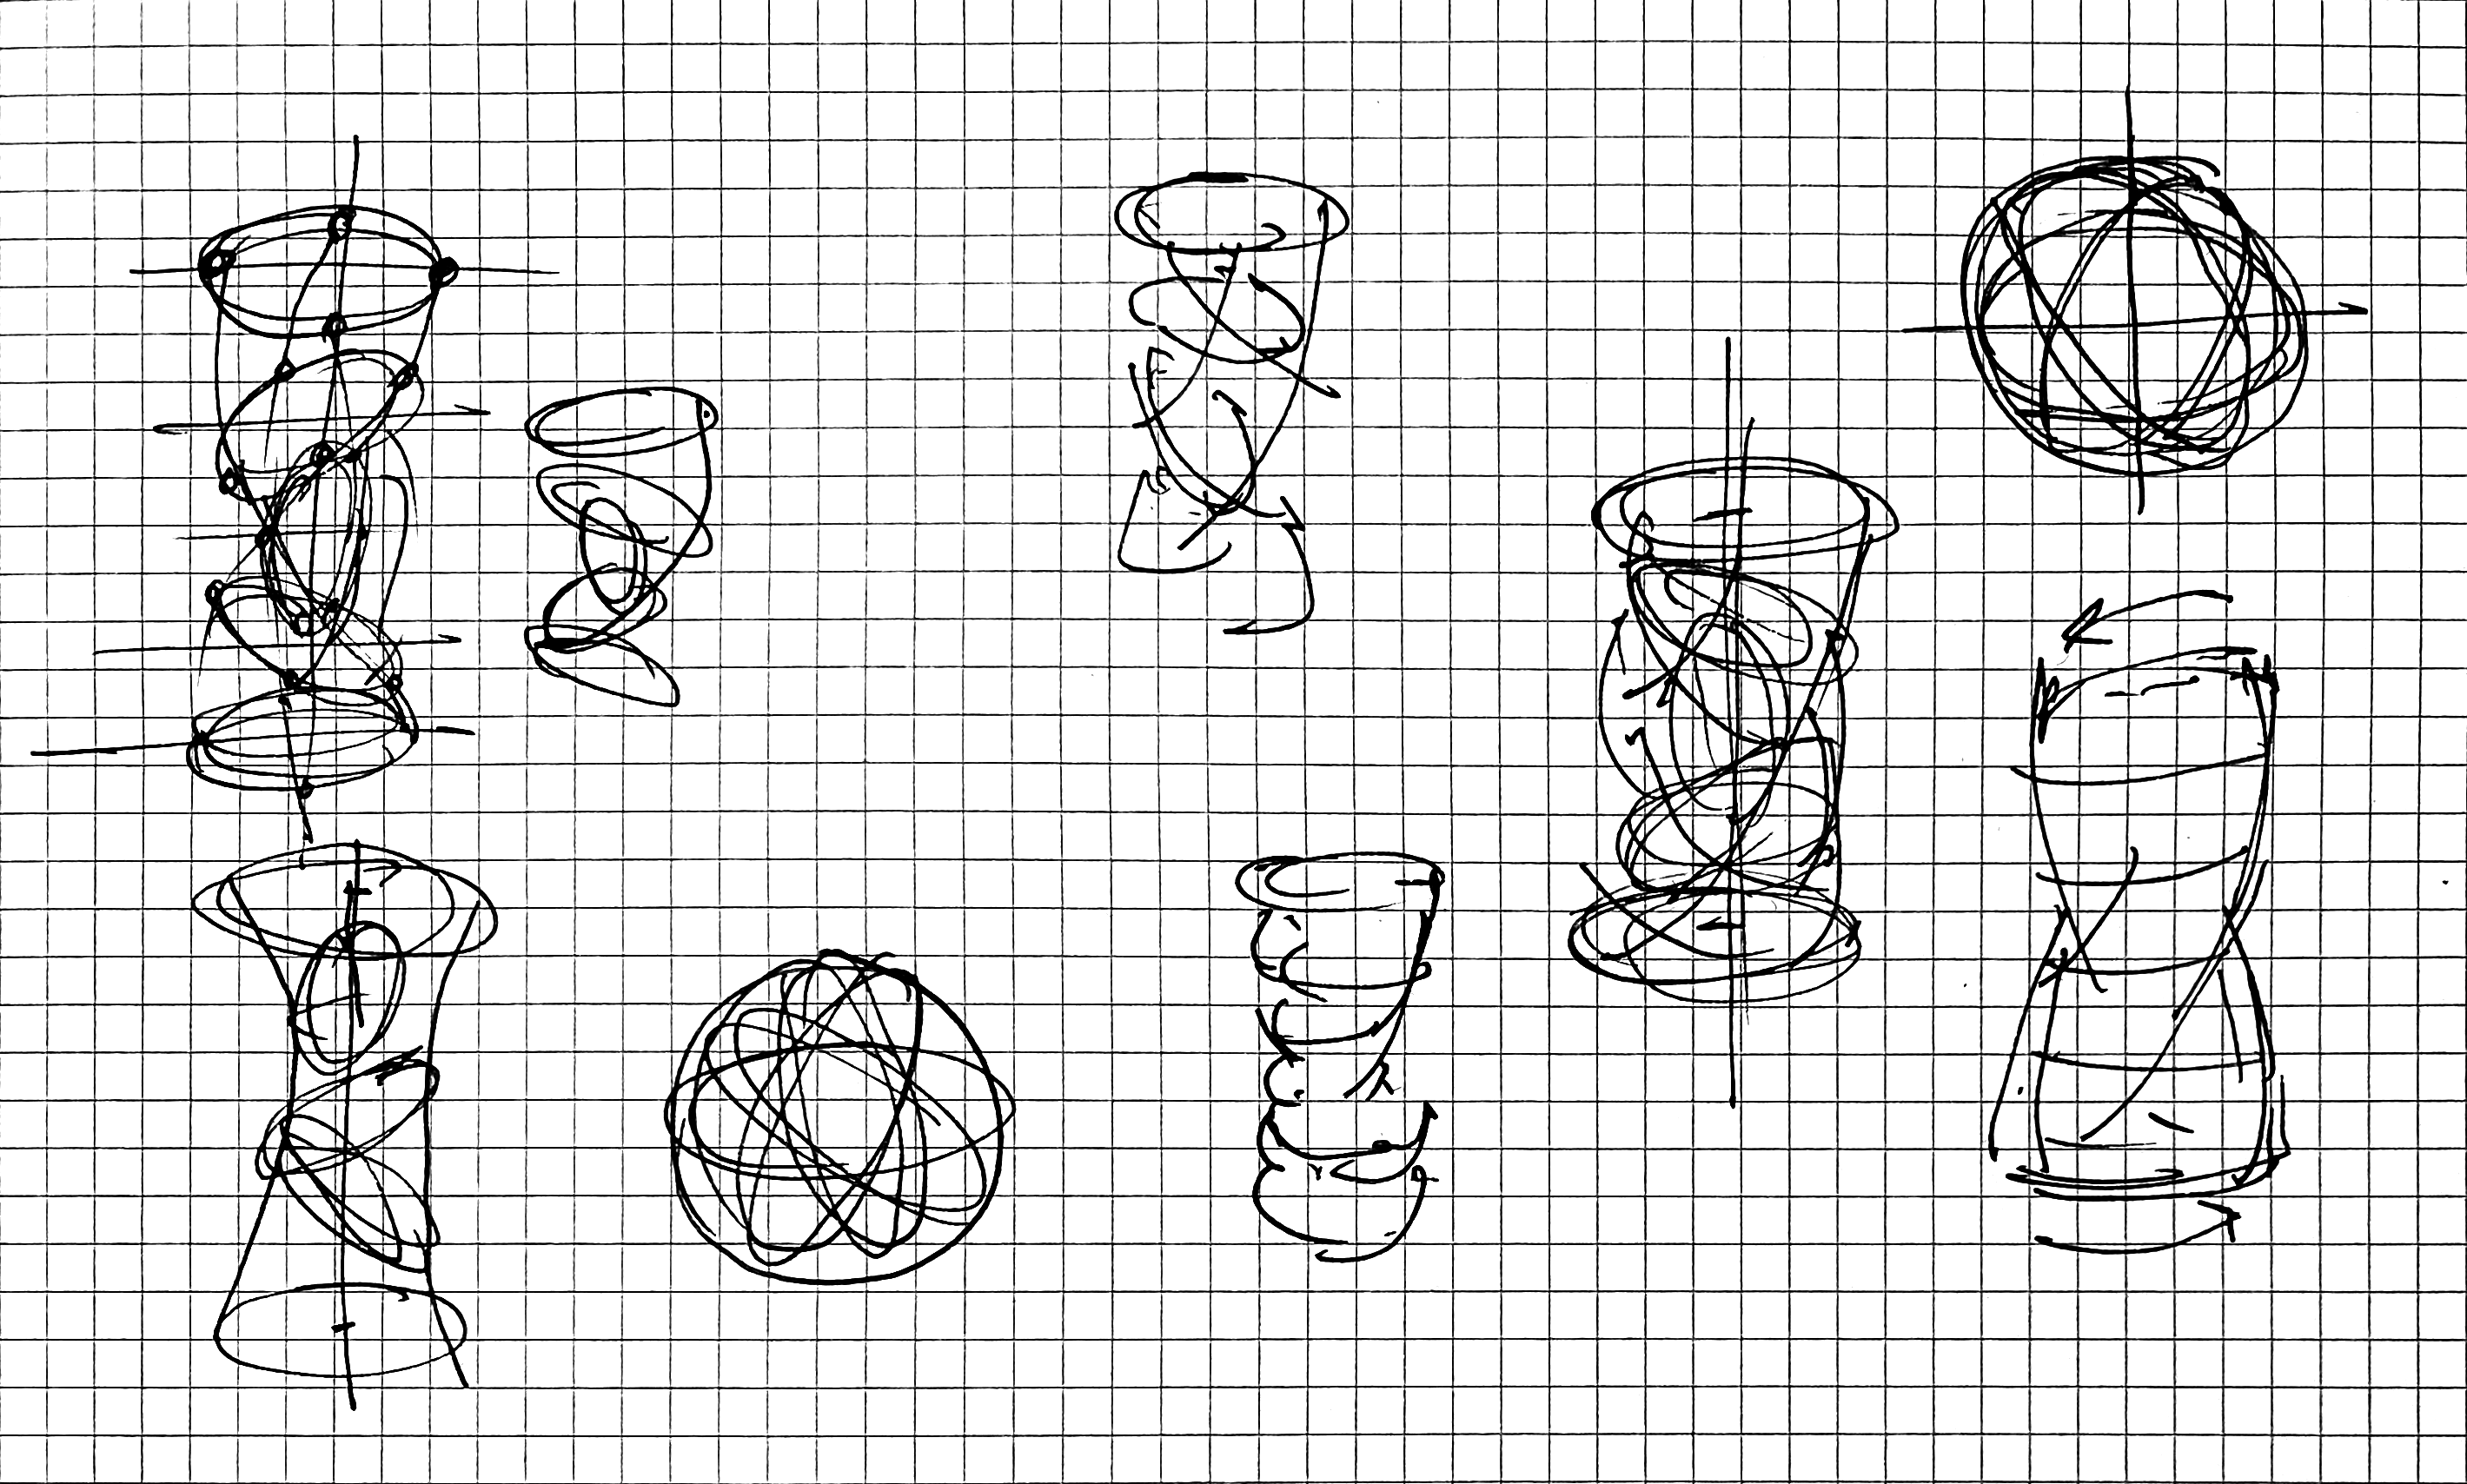
Once I have a basic design approach in mind, I can start to break it down into components to develop a strategy for building the model. Looking at the sketches I can observe that the twisting effect comes from having similar shape floors that rotate relative to each other as they go up the building.
Based on this observation, I can develop a strategy for building the model in Grasshopper. For example, I might first figure out how to create one floor, then copy the floor multiple times vertically, adding a small rotation to every copy. Of course, you will need to adjust your strategy while you build the model based on what you find works and doesn’t work, but starting with an initial visual concept and strategy will make the process of starting a model much easier.
Step 2: Define the base point
As we saw in the previous tutorial, a good place to start a model is with a base point that defines a point in space relative to which we can start defining the rest of our geometry.

Last time we used a Point component to define the point in the Rhino viewport. This time, let’s use a Construct Point component to build the point directly in Grasshopper. This component has three numerical inputs representing the X, Y, and Z coordinates of the point in 3-d space. Each of these inputs has a default value of 0, which means that when you first place the component on the canvas it will create a point at (0,0,0) or the model’s origin. If you want to move the point somewhere else you can input a Number Slider or Panel with a numerical value into any of the inputs. For now, let’s keep the defaults to leave our base point at the origin.
Step 3: Model the first floor
Once we have a base point to locate our tower, we need to define the shape of the first floor. Based on the sketch, I want something curvy and not rotationally symmetric so I get the twisting effect when I rotate the floors relative to each other. I will choose to model my floors with an ellipse but feel free to experiment with other shapes as well.

To create the ellipse we can use the Ellipse component, which creates an ellipse based on a center point and two numbers that define its radius in both directions. Let’s connect the base point we just created to the (P) input and connect two new Number Slider components to the two radius inputs.
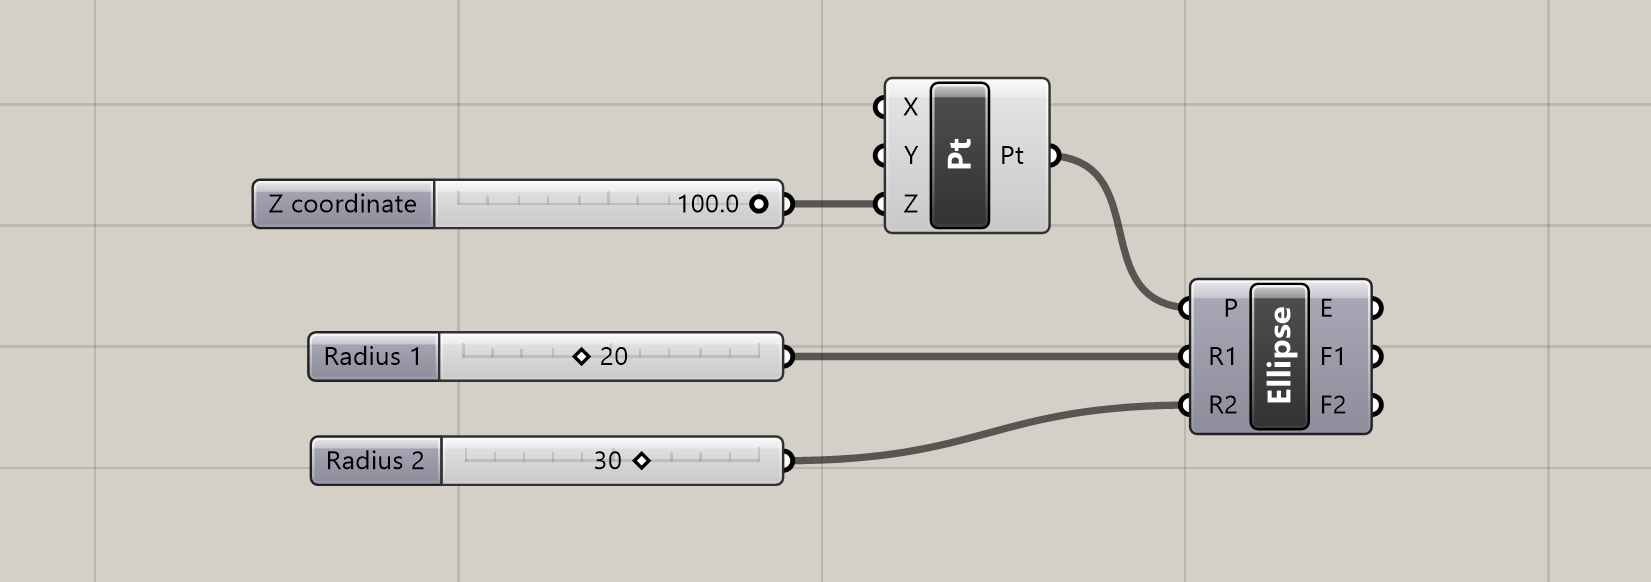
Here is a useful shortcut for creating Number Slider components: double-click anywhere on the canvas to bring up the search menu and type any number in the search bar. This will create a Number Slider component set to that number. The decimal places you use in the number controls the decimal resolution of the slider. By default, the range of the slider will go from 0 to the closest power of 10 to the number. You can also set the range yourself by typing the minimum and maximum values, along with the number, in the format min<number<max. For example, typing in 0<25<50 will produce a number slider with the range 0–50, set to 25.