Exercise: Parametric tower (2/3)
Step 4: Create more floors
Now that we’ve built one floor, we can multiply it vertically to create the other floors. In Rhino we would do this with the Copy or Array command. In Grasshopper, things work a little differently. Each component on the Grasshopper canvas runs individually, and stores the data it produces in its outputs. Even if that data is then passed on to one or more components downstream, the original data produced by a component will always remain within that component. This means that objects created by one component cannot be directly modified by another component, but only used for generating its own outputs.

The persistence of data in the canvas means that Grasshopper does not need separate components for copying or arraying objects. Instead, you can use the Move component to translate the object one or more times, and then hide the original object if you don’t want to see it in the Rhino viewport.
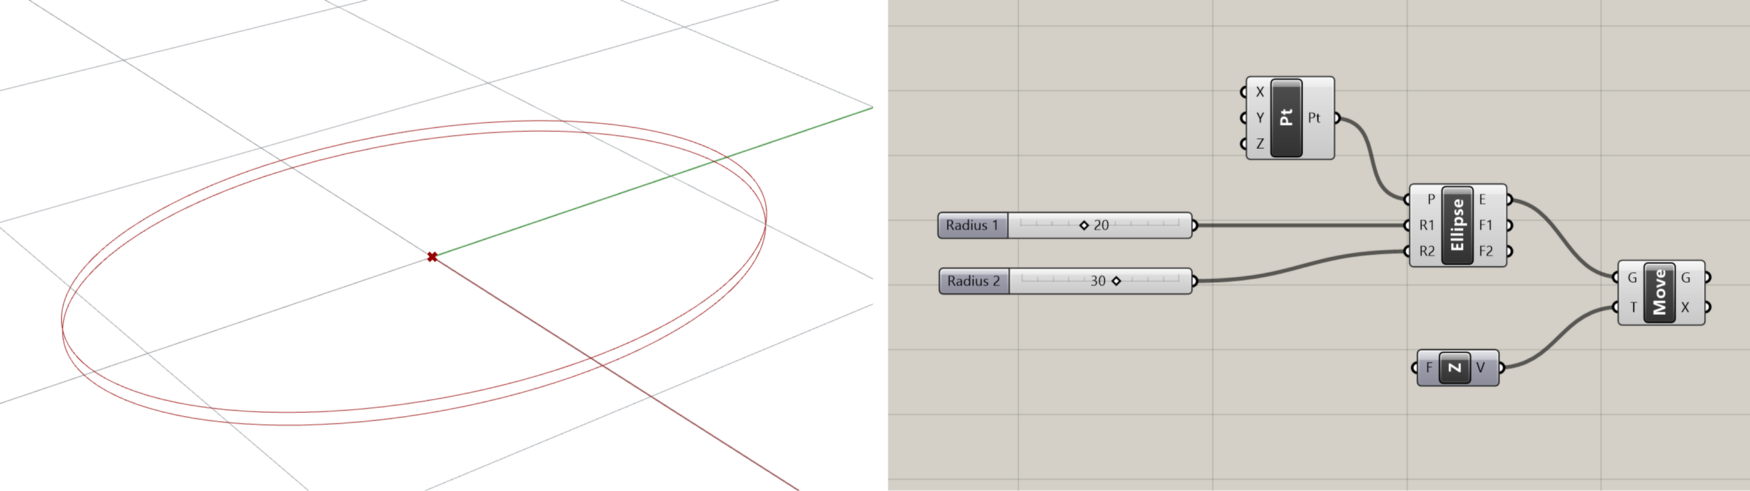
The Move component has two inputs: the geometry (G) you want to move and a translation vector (T) that describes the magnitude and direction of the move. We’ll discuss Vectors in more detail in the next lesson, so you can follow along for now or skip ahead if you’d like more background.
Create a new Move component and place it to the right of the Ellipse component on the canvas. To specify the geometry, connect the ellipse created in the (E) output of the Ellipse component to the Move component’s (G) input.

To specify the direction of the move, we will use a Unit Z component to create a new vector pointing in the model’s vertical Z direction. If you look in the ‘Vector’ section of the Vector tab of the component toolbar you will see that there is one Unit Vector component for each of the three coordinate axes. Place a new Unit Z component on the canvas and connect its (V) output to the (T) input of the Move component.
You should now see a copy of the ellipse appear one unit length above the original ellipse. The Unit Vector components have one input (F) which controls the magnitude of the vector. This input has a default value of 1.0, so by default these components create vectors of one unit magnitude (such vectors are called unit vectors).
Since the magnitude of the vector will control how much the ellipse is moved, it should be based on the height of each floor. But we don’t want to only create one floor. We want the Move component to run multiple times, creating a new ellipse each time and moving it vertically to its proper location. To do this we will first create a <List> of values representing the height of each floor, and then pass this List to the Unit Z component to create a set of vectors to move all the ellipses into place.

A quick way to generate a set of evenly spaced numbers is with the Series component (we will review these more in the <next lesson>). This component creates a set of sequential numbers based on three inputs — the starting value (S), the step or increment between each value (N), and the number of values to generate (C).
We will keep the default starting value of 0.0 so our first floor stays in the same place as the original curve. Let’s create two new Number Slider components to control the other two inputs. The step size controls the distance between each height value, so the first Number Slider component will set the floor-to-floor height of the building. The number of values we want to generate is based on the number of floors we want to create, so the second Number Slider component will control the total number of floors in the building. You can rename the Number Slider components so you remember what they control by right-clicking on them and changing the name at the top of the context menu.
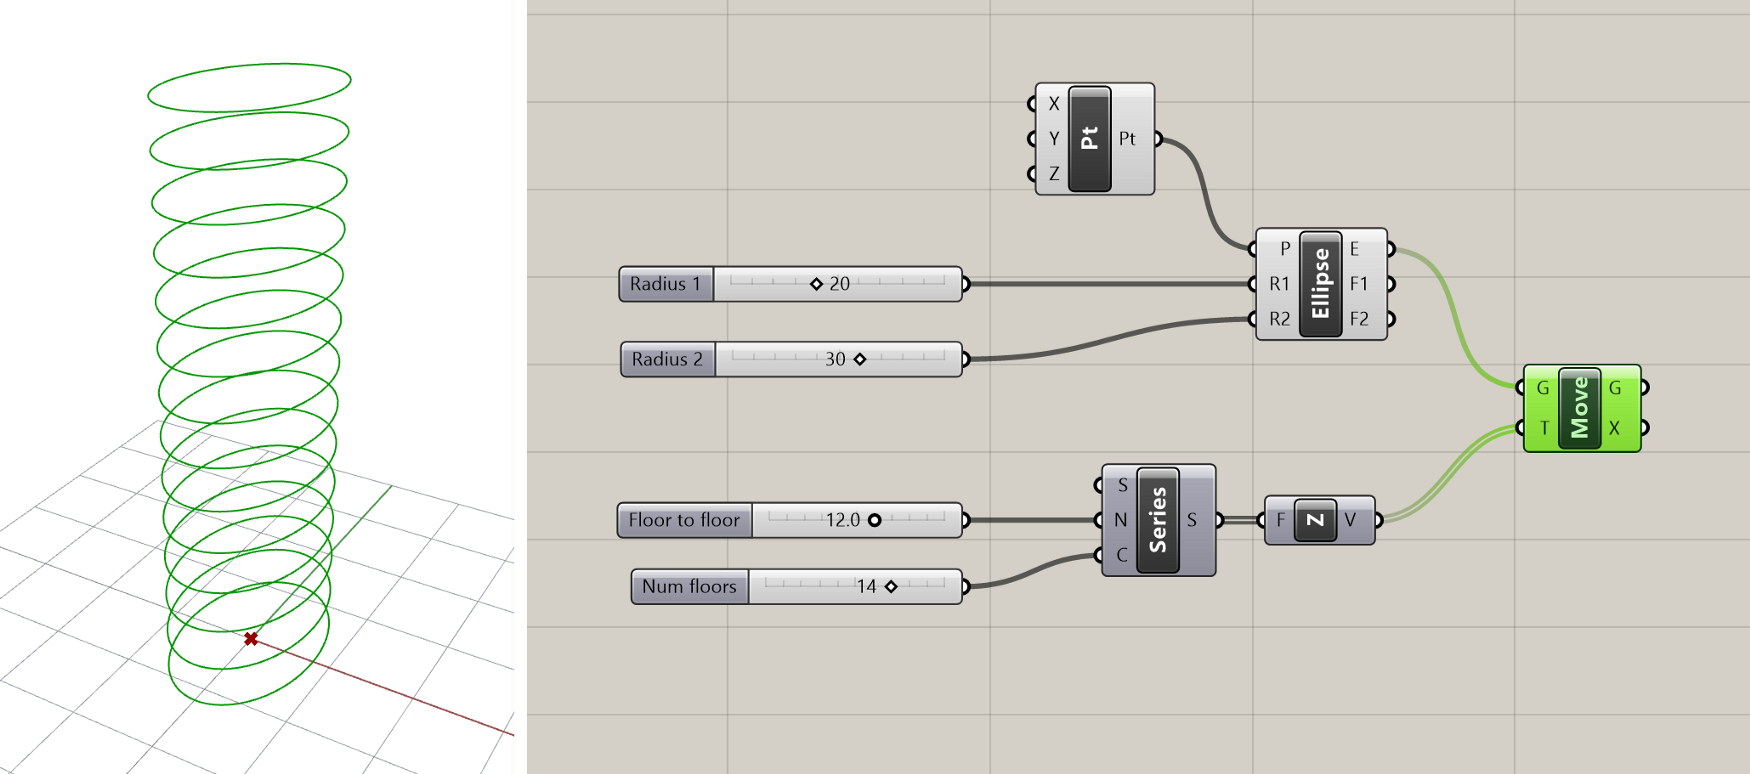
Connect the (S) output of the Series component to the (F) input of the Unit Z component to generate the floors of the tower. We now have a simple tower definition based on four parameters. You can slide the Number Slider components one by one to get a feel for how they control the model in real-time.