Exercise: Parametric tower (3/3)
Step 5: Let’s twist
To create the twist in our tower, we will apply a rotation to each of the ellipses. First, let’s use another Series component to generate a list of numbers representing the rotation angles of each floor. Since we need one rotation value for each floor, we should reuse the same Number Slider component that specified the number of floors previously for the (C) inputs of both Series components in our model. This way, if we want to change the number of floors in the future, all we have to do is change one Number Slider component and everything will update correctly. Reusing input data within your model is good practice for making robust models and minimizing the chance of bugs later on.

Once the rotation values are generated, we can use them to rotate our ellipses using the Rotate component. Create a new Rotate component on the canvas and connect the ellipses to its (G) input and the angle values to its (A) input. In Grasshopper, angles are usually expected to be in radians. If you’d prefer to work in degrees, you can pass the values through the Radian component first to convert the degrees to radians, and then pass the resulting radian values to the Rotate component.
Because the original non-rotated ellipses are still stored in the Move component, you will probably see the new rotated Ellipses overlapping them in the Rhino viewport. At this point, it may be useful to start hiding the outputs of some of the earlier components to create a cleaner visualization of the final result.
Step 6: Give it (solid) form
The last step of this exercise is to create the solid volumes of the building by extruding each ellipse vertically based on the building’s floor-to-floor height.

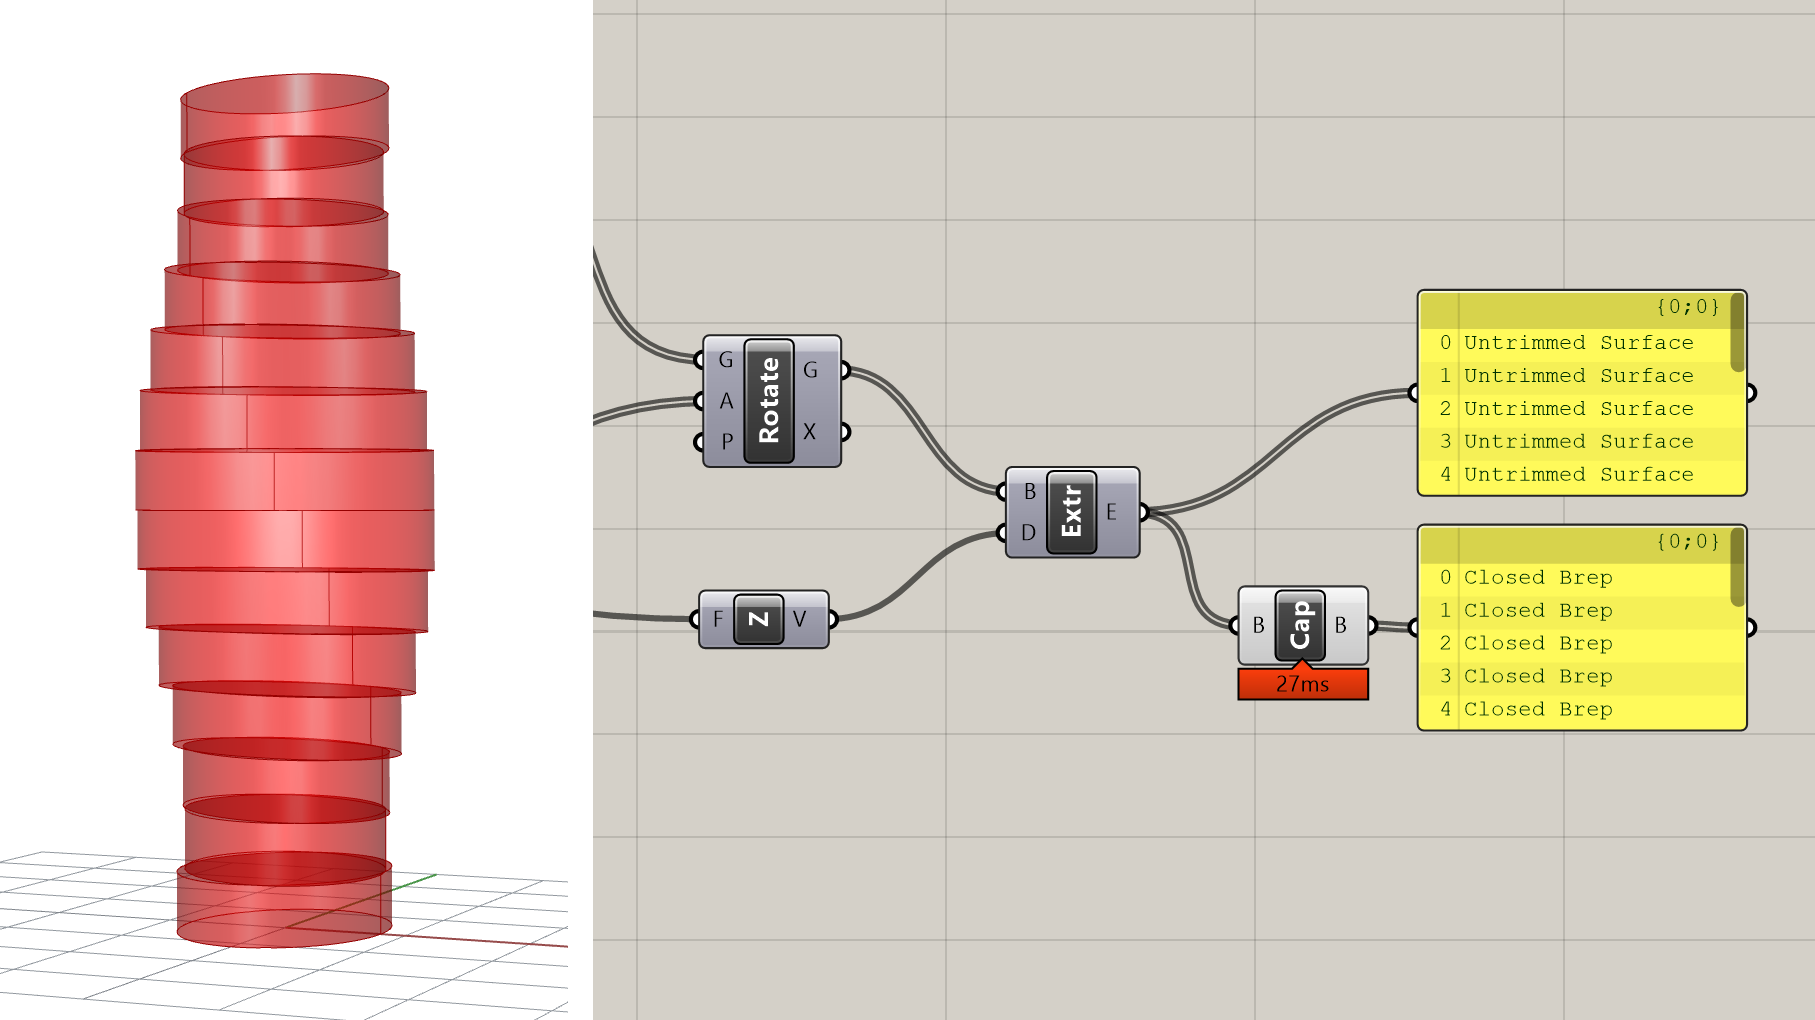
To extrude the ellipses we can use the Extrude component. This component has two inputs: one for the Curve you want to extrude, and one for the Vector that describes the magnitude and direction of the extrusion. Create a new Extrude component and connect its (B) input to the (G) output of the Rotate component which is storing the rotated ellipses.
To define the direction of extrusion for each curve, let’s use another Unit Z component. Connect its (F) input to the Number Slider component we created previously to control the floor-to-floor height and it’s output to the (D) input of the Extrude component. Since we are connecting multiple curves but only one vector, the same vector will be reused for each extrusion, which is fine since all the floors of the building have the same height.

At this point, you should see a stack of ribbons defining the shape of the tower. The last step is to create the lower and upper surface of each volume by passing the result of the Extrude component into a Cap component. This component will fill in any planar holes in a Surface or Polysurface object. Once the top and bottom holes are capped, we will have one closed Brep or Polysurface object defining the volume of each floor in the tower.
CHALLENGE
We built our simple parametric tower definition based on elliptical floors. What if we wanted rectangular floors instead? The beauty of Grasshopper is that once you define your model’s logic once, it should be relatively easy to make changes by replacing certain aspects of the model while keeping the rest of the logic intact.
Try replacing the Ellipse component with one or more other components to change the shape of the floors while keeping the rest of the tower definition the same. What kind of interesting towers can you create by combining the twist operation with floors of different shapes?
Once you’ve made the changes, capture a screenshot of your Rhino and Grasshopper window so that the additional component(s) are visible. Name the file with your UNI and/or name, and upload to: https://www.dropbox.com/request/qrUUqgwCX6YkELizBqsM

Conclusion
In this exercise, we defined the basic twisting form of the parametric tower. The five Number Slider components we created while building the model can now be used to control the various parameters of the tower. Spend some time experimenting with the parameters and see what kind of different tower shapes you can create. In case you got lost along the way, you can download a finished version of the demo here.